Here’s a wild stat: According to the National Center for Home Food Preservation, home canning increased by over 30% in recent years, especially after the pandemic as more people turned to homemade food security. What’s driving it? A love for self-reliance, sustainability—and let’s be honest, the deep satisfaction of hearing a jar pop as it seals.
If you’ve ever wanted to capture the season’s freshest flavors, save money, reduce waste, or just create your own delicious jams, pickles, or sauces, then mastering the basics of canning is a must. But before you dive in, let’s break down exactly what your kitchen needs for successful canning & preserving.
Core Equipment for Every Home Preserver
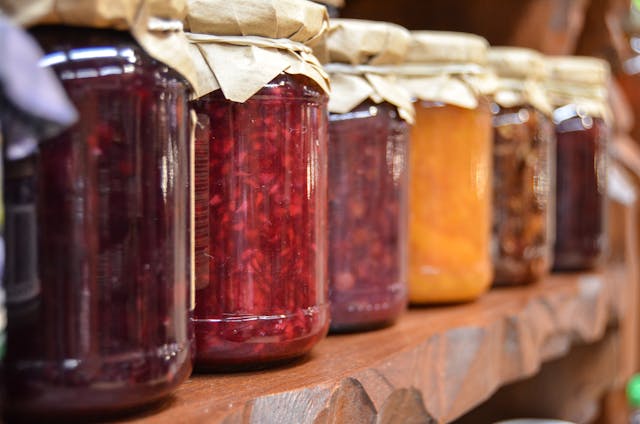
1. Canning Jars (and the Right Lids)
Use glass jars specifically designed for canning—like mason jars. Pair them with two-piece lids (flat lid + screw band) for proper vacuum sealing.
Choose jar sizes based on your needs: small for jams and spreads, quart-size for sauces or vegetables. Always inspect jars for cracks or chips before reuse.
2. Large Stockpot or Water Bath Canner
For high-acid foods like fruits, tomatoes, and pickles, water bath canning is standard. You’ll need a deep pot with a rack to fully submerge jars in boiling water.
3. Pressure Canner (for Low-Acid Foods)
Preserving meats, broths, and most vegetables? You’ll need a pressure canner—not a pressure cooker. It safely reaches higher temperatures to destroy bacteria like botulism.
4. Funnel and Ladle
A wide-mouth funnel keeps jar rims clean while filling. A heat-safe ladle helps pour hot liquids without spills.
5. Jar Lifter and Tongs
Jar lifters let you move hot jars safely in and out of boiling water. Silicone-tipped tongs are great for placing lids without touching them.
6. Bubble Remover and Headspace Tool
Trapped air = bad news. A bubble remover ensures smooth surfaces inside, while a headspace tool helps leave proper room for vacuum sealing.
7. Clean Towels and Labels
Always have clean, lint-free towels on hand to dry jars. Label every jar with contents and date—future you will thank you!
Must-Have Ingredients and Add-Ins
Beyond tools, you’ll need these pantry staples to actually start preserving:
- Fresh produce: Use fruits and vegetables at peak ripeness.
- Pickling salt: Avoid iodized salt—it can cloud brines.
- Sugar: For jams, it’s a preservative—not just a sweetener.
- Vinegar: Use white or apple cider vinegar (5% acidity).
- Pectin: The setting agent for jams and jellies.
- Whole spices: Mustard seed, peppercorns, dill, garlic, bay leaf for depth and aroma.
Nice-to-Have Extras (That Make Life Easier)
These aren’t essential, but they’re fantastic time savers:
- Magnetic lid lifter – avoids touching sterile lids
- Digital thermometer – checks safe temperature ranges
- Food processor – for chopping or puréeing large batches
- pH strips – ensure safe acidity, especially with borderline foods
- Dehydrator – useful for drying fruits before preserving or as a method on its own
Best Practices for a Safe and Organized Workspace
1. Clean As You Go
Canning is messy. Keep things sanitary by wiping surfaces, rinsing tools, and staying tidy as you work.
2. Sterilize Jars Before Use
Use the boiling, oven, or dishwasher method. Never skip sterilization—even if your food is going to be processed.
3. Follow Tested Recipes
Don’t wing it. Use trusted resources like USDA guides, Ball Blue Book, or reputable blogs with science-backed canning instructions.
4. Don’t Skip Headspace
That small gap between lid and food is crucial. Overfilling can cause poor seals or overflow.
5. Listen for the “Pop”
When jars cool, you’ll hear a little pop. That’s the vacuum seal. Always double-check by pressing the lid’s center. If it flexes—refrigerate and eat soon.
Choosing the Right Foods to Preserve
Some foods are better suited for beginners:
- Tomatoes (with added lemon juice)
- Strawberries, peaches, apples
- Carrots, cucumbers, green beans
- Pickled onions or radish
- Salsas, sauces, chutneys
Avoid:
- Dairy (unsafe for jar canning)
- Flour- or cornstarch-thickened sauces
- Low-acid foods without pressure canning
Common Mistakes to Avoid While Canning
1. Using untested or modified recipes
Altering acidity or ingredients can make your food unsafe for shelf storage.
2. Reusing jar lids
Always use new lids to ensure a proper seal.
3. Not adjusting for altitude
Processing times change with elevation. Check your altitude and recipe adjustments.
4. Ignoring headspace
Too little? Overflow. Too much? Poor seal. Use a headspace tool for accuracy.
Setting Up a Seasonal Canning Calendar
Spring
- Strawberries, asparagus, rhubarb
Summer
- Tomatoes, cucumbers, peaches, plums
Autumn
- Apples, pears, beets
Winter
- Citrus, onions, cranberries
Make a seasonal chart or digital spreadsheet to plan what you’ll can month by month. Your pantry will stay full year-round!
Organizing Your Kitchen for Canning Day
Create dedicated stations:
- Prep zone for washing, cutting, mixing
- Cooking area for boiling jars and preparing food
- Sealing station for pouring and capping
- Cooling space for sealed jars to rest
Having a system makes the day smoother and more efficient—especially for large batches.
How to Preserve Flavor, Color, and Texture
- Use ripe but not overripe produce
- Add lemon juice to apples and pears to prevent browning
- Use small batches for better jam flavor
- Avoid overprocessing (follow timing exactly)
Getting the Family Involved
Turn preserving day into a fun family tradition:
- Kids can snap beans, wash fruit, or decorate labels
- Teens can handle timers or help pour brine
- Adults can chop, stir, and manage hot jars
It’s an opportunity to pass down skills while creating memories (and filling shelves).
Sustainable and Waste-Free Preserving
Home preserving is green by nature—but you can go further:
- Reuse jars and rings year after year
- Save scraps to make vinegar, jelly base, or compost
- Shop at local farmers markets for seasonal, zero-waste produce
- Use leftover brine on roasted vegetables or in marinades
Creative Ideas to Try
Once you’ve nailed the basics, try experimenting:
- Herb-infused jams – Think rosemary-peach or thyme-blueberry
- Spicy pickles – Add jalapeño, chili flakes, or garlic
- Savory preserves – Try tomato chutney, onion jam, or plum sauce
- Gifting jars – Add twine, fabric covers, or handwritten labels for the holidays
Conclusion
At the end of the day, what your kitchen needs for successful canning & preserving is more than equipment—it’s the mindset. When you’re equipped with the right jars, tools, safe methods, and seasonal awareness, preserving becomes second nature.
Whether you’re making a spicy carrot pickle or your first strawberry jam, being prepared ensures delicious results that last beyond the season.
So stock those jars, prep your tools, and embrace the process.
Because when you know what your kitchen needs for successful canning & preserving, you’re not just saving food—you’re preserving flavor, memory, and joy one lid at a time.